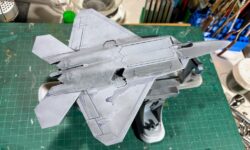
When cleaning goes sideways

About once a quarter I give my airbrush a deep clean which includes soaking the smaller components in Mr. Tool Cleaner, which is a very strong cleaner the will dislodge anything. Usually I finish that put it back together, flush it with water and it’s ready to go. The first thing to paint was the underside of the CF-22 I’m working on as part of my RCAF what-if series. This comprises mixing AK Gen 3, and Gen 3 thinner and a drop of two of Vallejo Airbrush Flow Improver. I’m still working my way to get the AK Gen 3 ratios dialed in as easy as I find using the Tamiya. One thing you must to with the AK is several light coats where the Tamiya is more forgiving if you are a bit heavy on the airbrush trigger. Right away I noticed the ratio was off, but I’d had…
Continue reading

Bench Update Dec 25

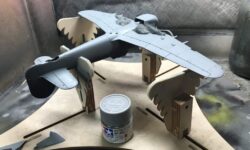
Sprayed Vallejo Metal Color Aluminium to the wheel wells of the 1/48 Typhoon.   Airbrushing is something that you have to do frequently to stay skilled in it. Knowing your mediums are also important. I sprayed the underside of the Typhoon with Tamiya XF-83 Medium Sea Grey and it did not disappoint. I thin to the consistency of skim milk and then use light coats. By the time I’m finished one coat it’s ready for another at the point I started.   Today everything just worked out the first time so a Zen moment.     Happy Holidays to all.

Continue reading

Hasegawa 1/72 F-18A Part 2

Got the upper and lower fuselage glued and in place.  There are some fit issues particularly around the engine intakes and behind where the wings will go. There will be some time filling and sanding here. Onto the exhausts. Started with a coat of Vallejo black primer. Followed up with a coat of Vallejo’s Metal Color Jet Exhaust. If you hav’nt tried this yet I would highly recommend it.  No thining required and airbrushes on beautifully  Next step will be to add some basic weathering, again keeping to the three-foot rule.

Continue reading